Quick Start
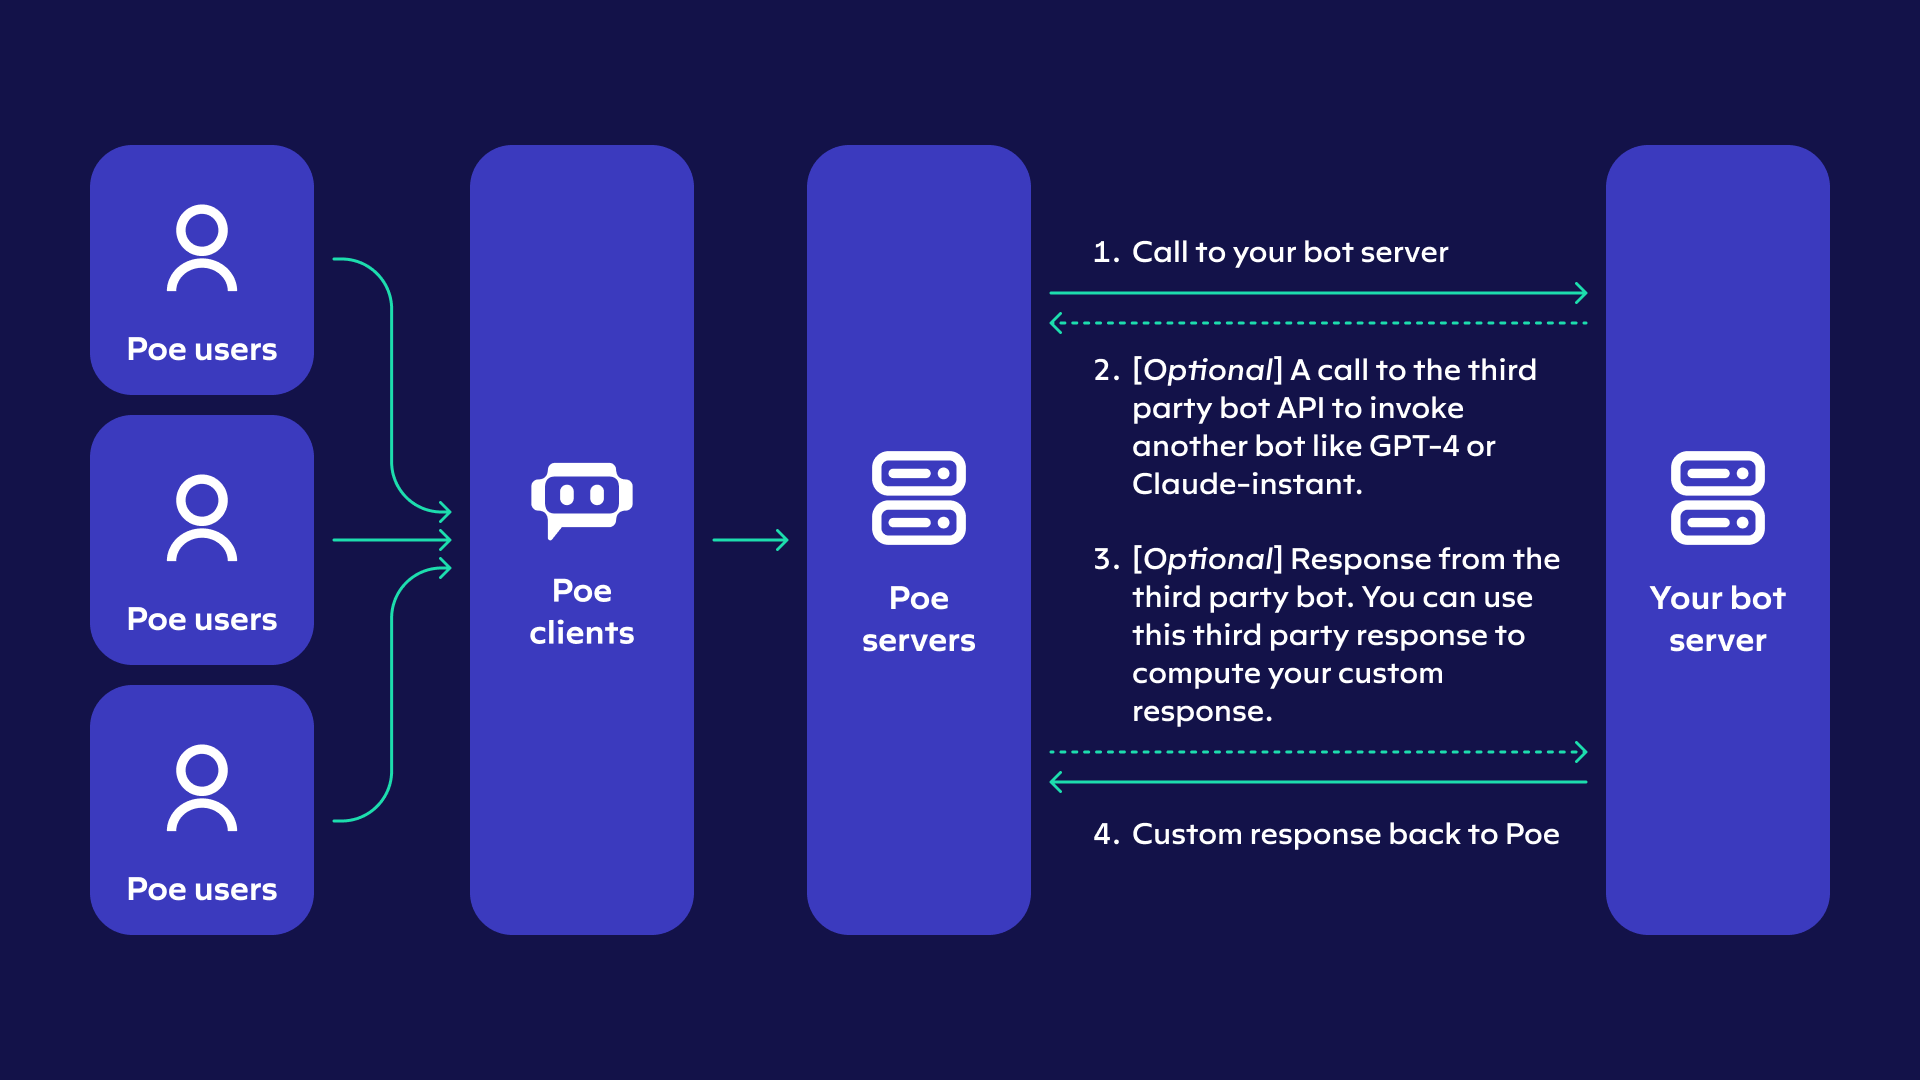
In this quick start guide, we will build a bot server in Python and then integrate it with Poe. Once you have created a Poe bot powered by your server, any Poe user can interact with it. The following diagram might be useful in visualizing how your bot server fits into Poe.

For more information on Poe server bots, check out the Poe Protocol Specification.
Step 1: Project Setup
Make sure you have Python installed. In your terminal, run:
git clone https://github.com/poe-platform/server-bot-quick-startcd server-bot-quick-startpip3 install -r requirements.txt
Inside the server-bot-quick-start project directory, you will see several different example server bots. For this guide, we will focus on echobot.py. Open that file in your editor, and we will move onto the next step, Deploying Your Bot.
Step 2: Deploying your Bot
📘 Using Modal
We recommend using Modal to deploy your
echobot.py, but you can use any deployment method of your choice (e.g. ngrok, Render, local hosting, etc.). If you already deployed your bot to a public URL, you can skip to integrating it with Poe.
Install the Modal client
Open a terminal and run pip3 install modal
Setup your Modal token
This step involves setting up access to modal from your terminal. You only need to do this once for your computer. In the terminal, run modal token new --source poe. If you run into a "command not found" error, try this.
If that command runs successfully, you will taken to your web browser where you will be asked to log into modal using your Github account.

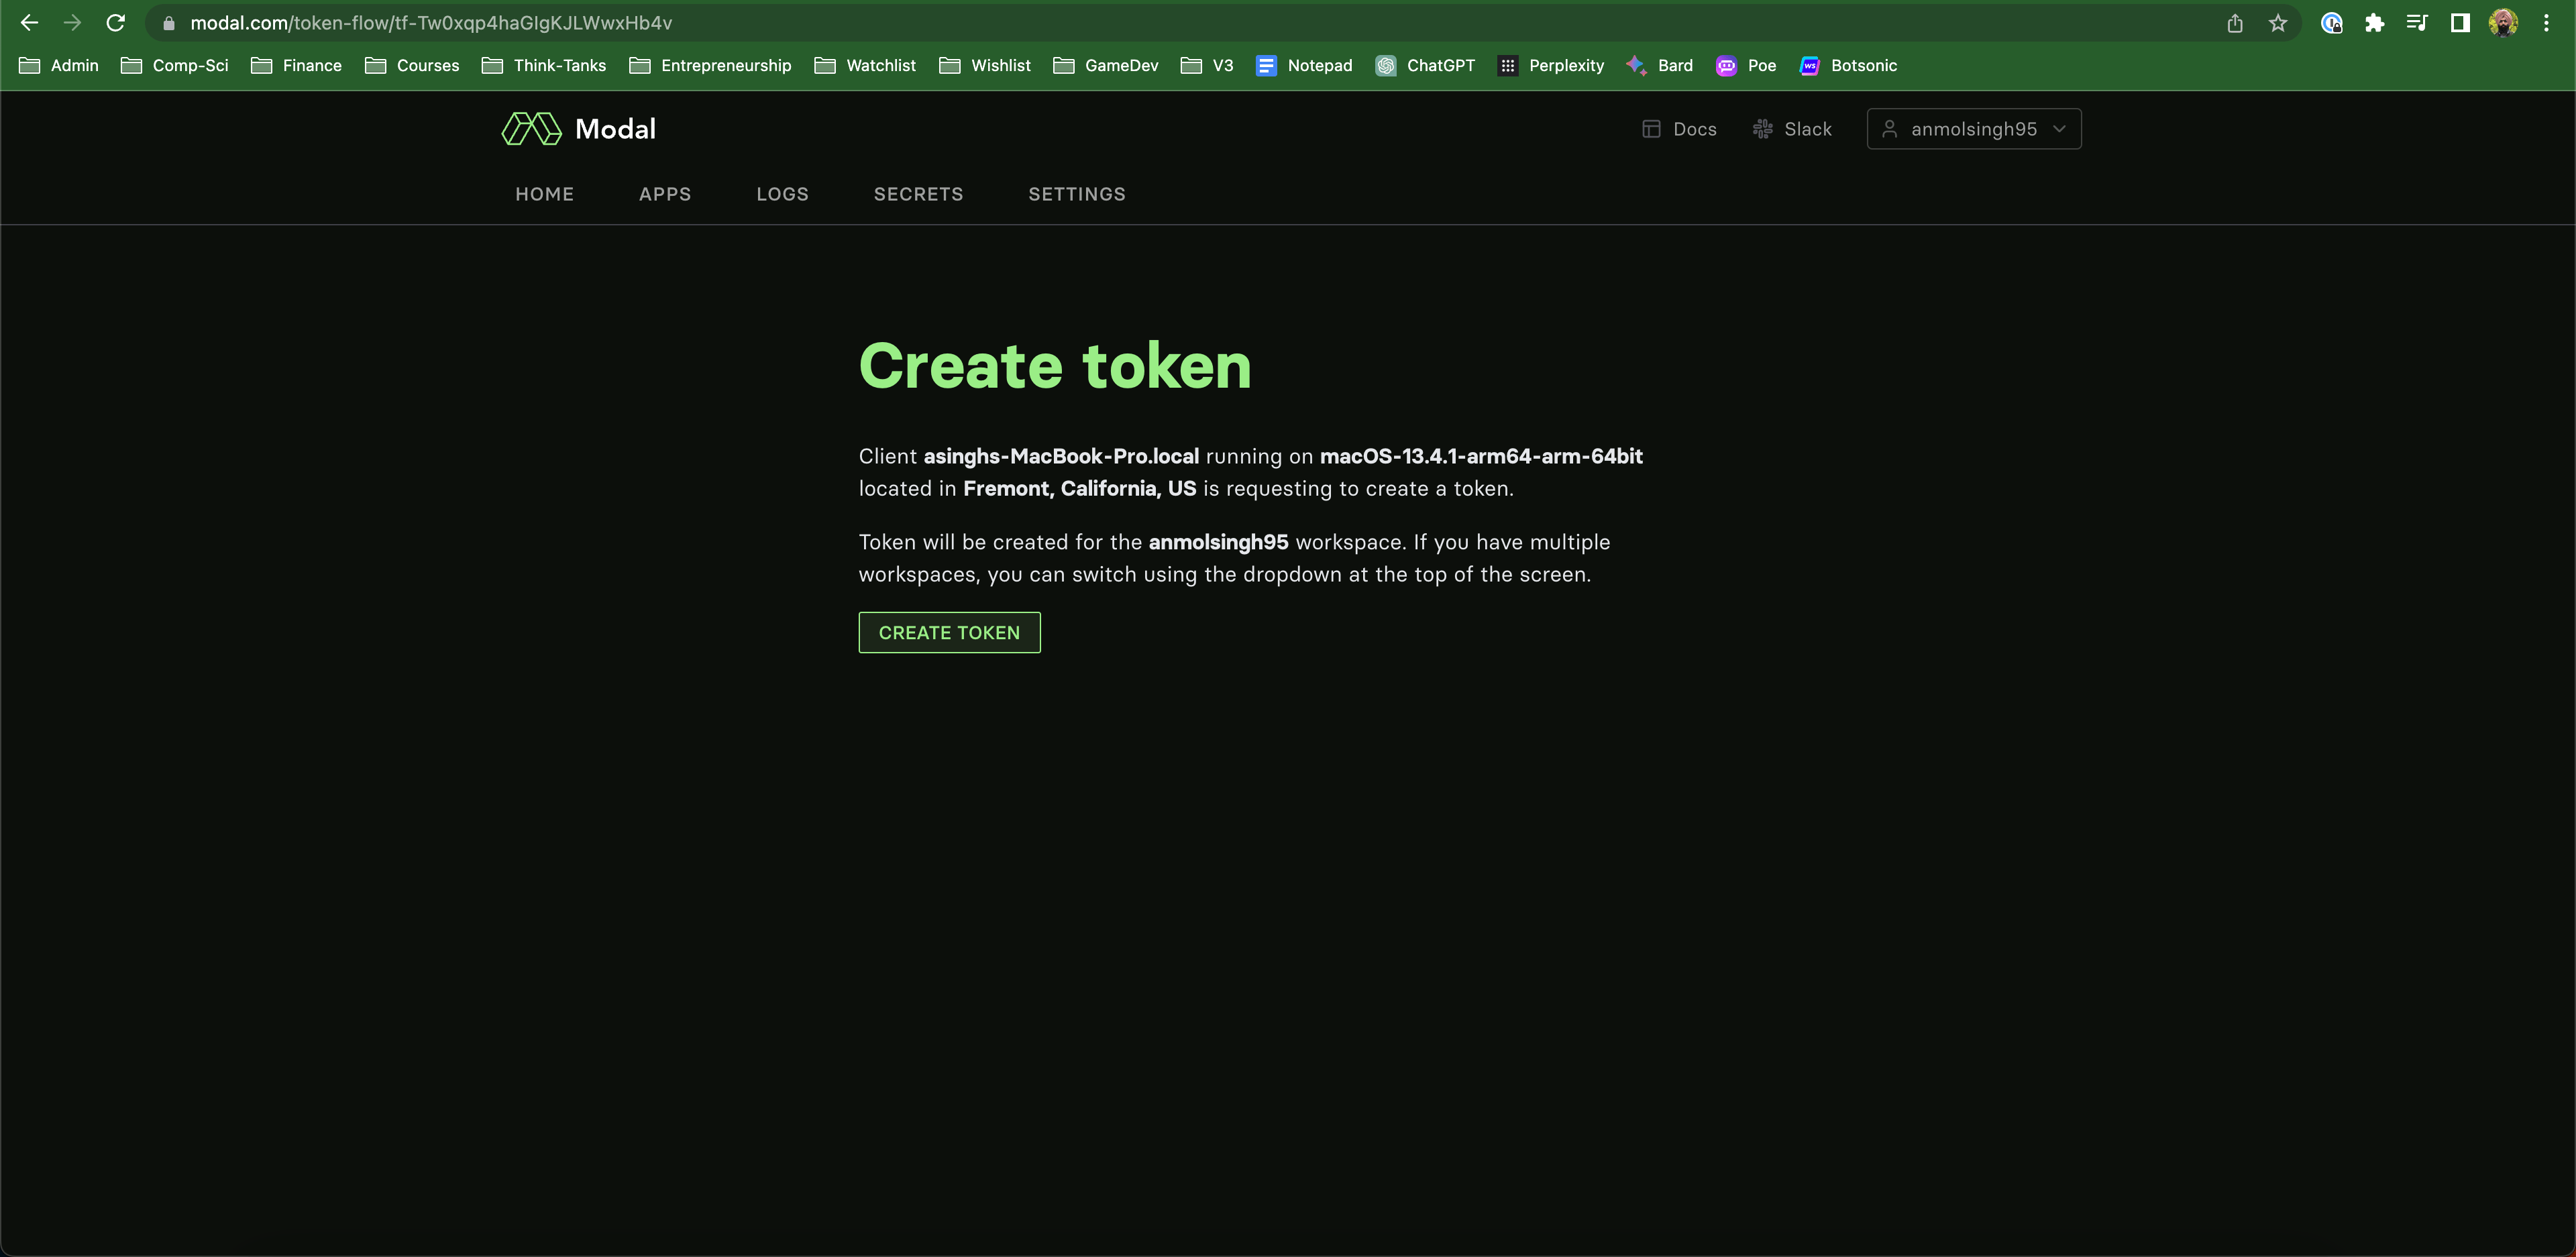
After you login, click on "create token". You will be prompted to close the browser window after that.

Deploy to Modal
In terminal, run the following command from your server-bot-quick-start directory:
modal serve echobot.py
📘 modal serve
modal servedeploys an ephemeral version of your app which live updates in response to any code change to echobot.py. This is meant for development purposes, and your app will shutdown when the command stops running. Once your app is ready for production, you can usemodal deployinstead to persist your app.
In the terminal output, you should see the endpoint your application is deployed at. You will need this URL for the next step, Integrating with Poe.

Step 3: Integrating with Poe
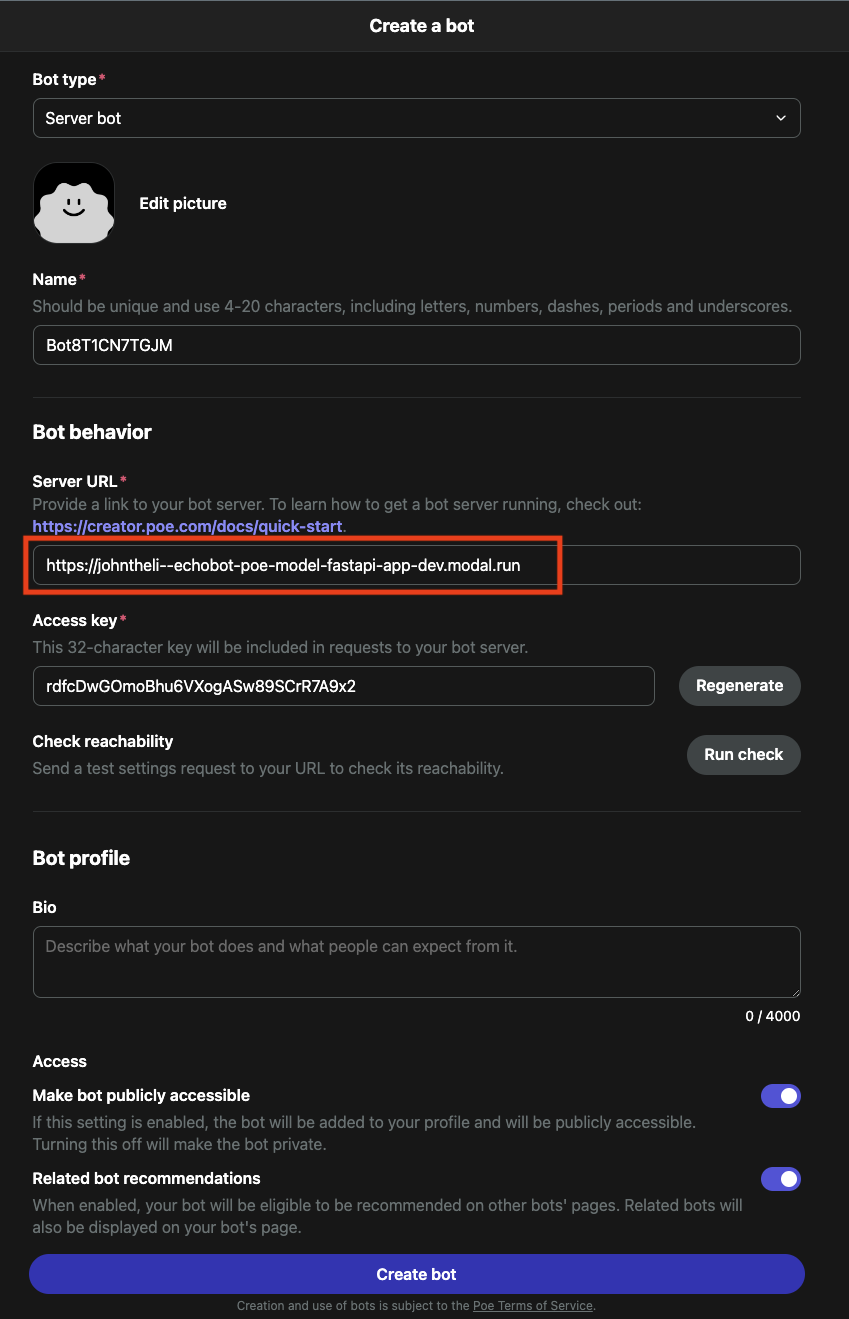
Navigate to the Bot Creation Page on poe.com and select Server bot as the bot type. That should bring you to the following form:

Fill out your bot details, copying down the bot Name (you can edit this if you'd like) and the generated Access Key. You will need these two values in the next step. Paste the URL from the previous step into Server URL. Hit Create Bot to finish the bot creation.
🚧 Warning
Don't forget to update the Server URL if the endpoint your bot is hosted at changes! Generally, Modal seems to re-use the same URL on each deployment, but if you are having trouble sending messages to your bot, you should verify that the URL is correct.
Configuring the Access Credentials
Near the bottom of echobot.py, you should see the following line:
app = fp.make_app(bot, allow_without_key=True)Change that line to the following (replace <YOUR_ACCESS_KEY> and <YOUR_BOT_NAME> with the values you copied in the previous step):
app = fp.make_app(bot, access_key=<YOUR_ACCESS_KEY>, bot_name=<YOUR_BOT_NAME>)Now your bot is configured with the proper credentials! Save the changes to echobot.py, and Modal should pick up and deploy the changes. That's it! You should be able to talk to your bot on Poe.
Where to go from here
- One of the advantages of building a bot on Poe is the ability to invoke other Poe bots. In order to learn how to do that check out: accessing-other-bots-on-poe.md.
- Check out other detailed guides that show you how to enable specific features:
- Refer to the specification to understand the full capabilities offered by Poe server bots.
- Check out the fastapi-poe library, which you can use as a base for creating Poe bots.